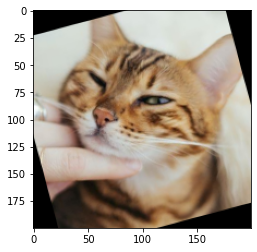
先來看看今天的結果圖
今天我們又請來了貓貓當我們助教囉~~~
-> 此篇文章的程式碼 github
Day03_圖片剪裁旋轉縮放_crop_rotate_resize.ipynb
1. 裁減圖片
裁減圖片的方式,不需要使用 OpenCV 特別的函數,
我們只需要知道座標後,決定要裁減的範圍即可。
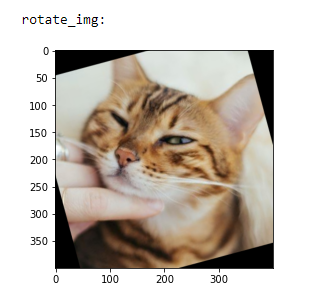
def" data-lang="python">def">def rotate_img(img):
    (h, w, d) = img.shape # 讀取圖片大小
    center = (w // 2, h // 2) # 找到圖片中心

    # 第一個參數旋轉中心,第二個參數旋轉角度(-順時針/+逆時針),第三個參數縮放比例
    M = cv2.getRotationMatrix2D(center, 15, 1.0)

    # 第三個參數變化後的圖片大小
    rotate_img = cv2.warpAffine(img, M, (w, h))

    return rotate_img
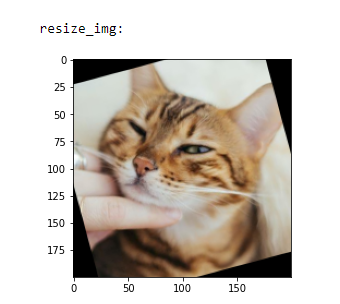
3. 縮放圖片 cv2.resize
縮放圖片我們使用 cv2.resize。
  def resize_img(img):

    scale_percent = 50 # 要放大縮小幾%
    width = int(img.shape[1] * scale_percent / 100) # 縮放後圖片寬度
    height = int(img.shape[0] * scale_percent / 100) # 縮放後圖片高度
    dim = (width, height) # 圖片形狀
    resize_img = cv2.resize(img, dim, interpolation = cv2.INTER_AREA)

    return resize_img
在 jupyter notebook 中,直接顯示的圖片結果看不出大小差異,
我們可以使用前篇文章中的 cv2.imshow ,
這樣就可以明顯看出圖片大小的變化。
Reference
https://www.chainnews.com/zh-hant/articles/420945635518.htm
https://blog.gtwang.org/programming/how-to-crop-an-image-in-opencv-using-python/
https://www.cnblogs.com/lfri/p/10596530.html
https://blog.csdn.net/JNingWei/article/details/78218837
https://blog.csdn.net/on2way/article/details/46801063